Table of Contents
Episode 19: Issgard, Land of Snow Flowers

With the piece of Ymir's Heart seized from Rachel's Temple, Bagot created a chimera that mimics a God. His next destination is not just north Midgard, but rather Issgard, the land of ice across the sea, where Jörmungandr and its followers are sealed. It is a known to have a barrier that prevents traveling between the two realms. Based on the records from the managers at Varmundt's Mansion, the Illusion were using an Airship to cross over. Your adventurer continues into Issgard, chasing after Bagot and preventing the resurrection of Jörmungandr.
- Level Required: 200
- Quest Prerequisite:
- Items Required:
- None
Main Story Quest
1. 
2. 
3.
4. 
5. 
6. 
7.
8. 
9.
10.
11. 
12. 
13. 
14. 
15. 

16.
17.
18. 
19. 
20. 
21.
22.
23.
24.
25.
26.
27. 
28.
29.
30.
31.
32.
33.
34.
35.
36.
37.
38.
39. 
40.
41. 
42.
43.
44.
45.
46. 
47. 
48.
49.
50.
51.
52.
53.
54. 
55. 
56.
57.
58.
59. Talk to Juncea inside the instance. She questions the friendship and suspects you been gossiping to Bagot about her behind her back. You notice something is strange about her, maybe something to do with Bagot. You try to comfort her, but its already too late. She is undergoes a transformation into a greater being.
60. Subdue transformed Juncea. You are wondering if Bagot made her go crazy. You decide to bring Juncea back to Ice Castle. Exit the instance.
61.
62.
63.
64.
65.
66. 
67. 
68.
69.
70.
71. 
72.
73.
74.
75.
76.
77.
78.
79.
80.
81.
82.
83.
84.
85.
86.
87.
88.
89.
Side Quests
Surveillance for an Underground Hideout
Super Strong Antennae across Frozen Scale Plains (jor_back2) and Frozen Scale Glaciers (jor_back3).
- Bury the 5 Super Strong Antennae marked on your minimap in jor_back2. Each hiding spot has a chance to fail and may require to repeatedly attempt to bury the device.
- Bury the 5 Super Strong Antennae marked on your minimap in jor_back3.
Rewarded with 2
Purification Saint
Chocolate Pie to eat because you look hungry. She asks if you seen a Cardinal with long hair and a wacky bag. The Cardinal was suppose to arrive in Issgard with Lehar. Voglinde asks you to find the other people who rode the airship and inquire if they have seen a Cardinal in a blue suit with long hair and a veil from Prontera.
- After arriving in Aldebaran, talk to Hellock who tells you to go to Prontera. He cannot join you due to various agreements with the others.
- Talk to Ellis, the Acolyte Officer. You tell her you are not here to become an acolyte, but instead for Voglinde's errand. Ellis tells you she may be at the dormitory in Prontera Castle.
Rewarded with 30
Quests unlocked:
- Frozen Sea - Side Quest
- Friederike's Day - Daily Quest
Frozen Sea
- Check the first trap. An Icewind Huntsman stops you asking why are you touching their traps. You explain the situation and the Iwin suggests you to check north as the creatures there became more ferocious.
- Kill 10x monsters in jor_back2 and bring back 3
Frozen Meat (automatically collected when killing monsters).
- Talk with Alp and Iwin Diver inside the pit. This is Alp's first time seeing the Rgan race and the Iwin Diver explains what they are. He asks you not to provoke too many Rgans, but to hunt a few while investigating.
- Kill 5x monsters in jor_ab01.
- Kill another 5x monsters in jor_ab01.
- Kill another 5x monsters in jor_ab01 and collect 2
- Kill another 10x monsters in jor_ab02 and collect 2
- Investigate the end of the pit. Mark didn't find any other areas that leads to other places. The Iwin Diver decides that this is the end and we should report back to Lehar and the others.
Rewarded with 10
Quests unlocked:
- Abandoned Pit Fl 1 - Daily Quest
- Abandoned Pit Fl 2 - Daily Quest
- Dig and Dig - Daily Quest
- Do We Need a Refrigerator? - Daily Quest
- Crispy Tools - Daily Quest
Search for the Lost
Quests unlocked:
- Searching for Survivors - Daily Quest
Special Way to Survive
Rewarded with 10
Quests unlocked:
- Our Precious Food - Daily Quest
- Elegant Hobbies - Daily Quest
Preaching Doctrine
Rewarded with 10
Curious Things
Rewarded with 10
Daily Quests
| NPC | Quest | Rewards | |||
|---|---|---|---|---|---|
| Base EXP | Job EXP | Items | Reputation | ||
 | Finding an Underground Hideout Bury the 10 Super Strong Antennae across jor_back2 and jor_back3. Locations will be marked on your minimap. | 52,243,795 | 3,900,000 | 2 Snow Flower Petal | 5 |
 | Happy Lunch Time with Zoryara Gather 15  Tough Thin Shell from Ice Straw Tough Thin Shell from Ice Straw | 52,243,795 | 3,900,000 | 2 Snow Flower Petal | 5 |
 | Secret Fun Gather 10 feathers of one type. List of acceptable feathers are: | - | - | 2 Snow Flower Petal | 5 |
→  Round Feather Round Feather | ? | ? | |||
→  Soft Feather Soft Feather | 45,713,321 | 3,250,000 | |||
→  Burning Feather Burning Feather | ? | ? | |||
→  Red Feather Red Feather | ? | ? | |||
→  Bird Feather Bird Feather | 39,182,846 | ? | |||
→  Cendrawasih Feather Cendrawasih Feather | ? | ? | |||
→  PecoPeco Feather PecoPeco Feather | ? | ? | |||
→  Blue Feather Blue Feather | ? | ? | |||
→  Harpy Feather Harpy Feather | ? | ? | |||
 | Procurement of Research Materials for Vellgunde Gather 3  Purified Magic Core Purified Magic Core Go to Freiderike and select Option 2: → Converts 10 Rgan's Low-Grade Magic Core for 1 Purified Magic Core | 52,243,795 | 3,900,000 | 2 Snow Flower Petal | 5 |
 | Select Menu for Lunch Gather 10 items for Lunch. The following items can be requested: →  Cloud Crumb Cloud Crumb →  Broken Liquor Jar Broken Liquor Jar →  Piece of Bamboo Piece of Bamboo → Cendrawasih Feather →  Straw Basket Straw Basket →  Brown Rat Tail Brown Rat Tail →  Yaga's Pestle Yaga's Pestle →  Denture from Dragon Mask Denture from Dragon Mask →  Jejellopy Jejellopy →  Leopard Skin Leopard Skin | 52,243,795 | 3,900,000 | 2 Snow Flower Petal 1 Rgan Transformation Scroll | 0 |
| | Abandoned Pit Fl 1 Lv 220 - Kill 40x Monsters in jor_ab01 and gather 20 Frozen Meat. | 18,000,000 | 14,000,000 | 2 Snow Flower Petal | 5 |
| Abandoned Pit Fl 2 Lv 240 - Kill 40x Monsters in jor_ab02 and gather 20 Frozen Meat. | ? | ? | ? | ? | |
| Dig and Dig Examine the ominous traces in jor_ab01 and jor_ab02. Locations will be marked on your minimap. | 52,243,795 | 3,900,000 | 2 Snow Flower Petal | 5 | |
 | Do We Need a Refrigerator? Kill 20x Monsters in jor_back2 and gather 20 Frozen Meat. | 9,000,000 | 7,000,000 | 2 Snow Flower Petal | 5 |
| Crispy Tools Ensure the Frozen Traps are working in jor_back2. Locations will be marked on your minimap. | 52,243,795 | 3,900,000 | 2 Snow Flower Petal | 5 | |
 | Friederike's Day Kill 10x Primitive Rgan and 10x Lowest Rgan. Gather 10  Rgan's Magic Core Rgan's Magic Core Rgan's Magic Core are randomly autolooted when killing Rgan. | 10,000,000 | 7,000,000 | 2 Snow Flower Petal | 5 |
 | Do not Feed Wildlife Retrieve 1  Monster's Feed from a sand pile in jor_back1 Monster's Feed from a sand pile in jor_back1 | 52,243,795 | 3,900,000 | 2 Snow Flower Petal | 5 |
 | Searching for Survivors Find survivors in jor_back3 then return to Maram | 52,243,795 | 3,900,000 | 2 Snow Flower Petal | 5 |
 | Help Moryara Fish Kill 20x Shining Seaweed | 9,280,800 | 6,821,600 | 2 Snow Flower Petal | 5 |
 | For Safe Work Kill 20x Limacina and 20x Calmaring | 20,508,000 | 10,000,000 | 2 Snow Flower Petal | 0 |
 | Rgan to Work Kill 20x Primitive Rgan | 10,154,320 | 7,254,000 | First Clear 10 Snow Flower Petal Repeated 2 Snow Flower Petal | 0 |
 | Elegant Hobbies Gather the following items: → 10 Tough Thin Shell → 10  Bait Bell Flower Bait Bell Flower → 10  Calapy Calapy → 10  Fluorescent Liquid Fluorescent Liquid | 32,652,372 | 3,900,000 | 2 Snow Flower Petal | 0 |
| | Priest, Have Mercy?? Gather 30  Shell of Rgan from Rgans Shell of Rgan from Rgans | 52,243,795 | 3,900,000 | First Clear 10 Snow Flower Petal Repeated 2 Snow Flower Petal | 0 |
 | Our Precious Food Gather 30 Rgan's Low-Grade Magic Core from Rgans | 32,652,372 | 3,900,000 | First Clear 10 Snow Flower Petal Repeated 2 Snow Flower Petal | 0 |
Note:
- All Daily Quests require level 200 unless stated otherwise.
- Daily Quests reset at 4:00AM Korean Time.
Instances
| NPC | Instance | Level Required | Party Count | Cooldown | Navigation | Prerequisite | Possible Rewards |
|---|---|---|---|---|---|---|---|
| | Iwin Patrol | 200 | 1+ | 1 Day | | Episode 19 - Main Story - Step 13 | Snow Flower Petal B.EXP: 52,243,795 J.EXP: 3,900,000 Ice Castle Reputation |
 | Airship Destruction | 200 | 1+ | 1 Day | | Episode 19 - Main Story - Step 35 | Snow Flower Petal  Snow Flower Magic Stone Ore Snow Flower Magic Stone Ore  Snow Flower Magic Stone Snow Flower Magic Stone  Shining Snow Flower Magic Stone Shining Snow Flower Magic Stone  Brilliant Snow Flower Magic Stone Brilliant Snow Flower Magic Stone  Mysterious Luminant Mysterious Luminant Ice Castle Reputation |
| | Simulation Battle | 200 | 1+ | 1 Day | | Episode 19 - Main Story | Snow Flower Petal Snow Flower Magic Stone Ore Snow Flower Magic Stone Shining Snow Flower Magic Stone Brilliant Snow Flower Magic Stone |
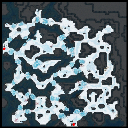
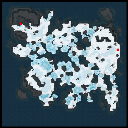
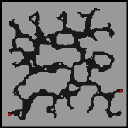
Fields / Dungeons
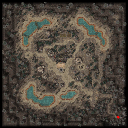
| Map Image | Name | Map Name | BGM # | Monsters |
|---|---|---|---|---|
| | icecastle | Issgard Ice Castle | 188 | - |
| | icas_in | Inside the Ice Castle | 188 | - |
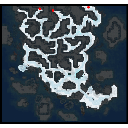
| | jor_tail | Frozen Tail | 187 | Ice Gangu |
| Shining Seaweed | ||||
| | jor_back1 | Frozen Scale Hills | 187 | Ice Gangu |
| Shining Seaweed | ||||
| Ice Straw | ||||
| | jor_back2 | Frozen Scale Plains | 187 | Ice Gangu |
| Ice Straw | ||||
| Unfrost Flower | ||||
| Limacina | ||||
| | jor_back3 | Frozen Scale Glaciers | 187 | Ice Gangu |
| Calmaring | ||||
| Primitive Rgan | ||||
| Lowest Rgan | ||||
| Limacina | ||||
| Ultra Limacina (MVP) (Respawn: 12:00HR ~ 18:00HR) |
||||
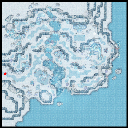
| | jor_ab01 | Abandoned Pit Fl 1 | 189 | Cave Calmaring |
| Cave Flower | ||||
| Wasted Primitive Rgan | ||||
| Hallucigenia Baby | ||||
| Modified Senior Rgan | ||||
| | jor_ab02 | Abandoned Pit Fl 2 | 189 | One Eye Dollocaris |
| Hallucigenia | ||||
| Entangled Intermediate Rgan | ||||
| Wasted Intermediate Rgan | ||||
| Two Eyes Dollocaris | ||||
| | jor_dun01 | Snake God's Warmth Fl 1 | 189 | Primitive Rgan |
| Heart Hunter AT | ||||
| Lowest Rgan | ||||
| Lesser Rgan | ||||
| | jor_dun02 | Snake God's Warmth Fl 2 | 189 | Heart Hunter AT |
| Lowest Rgan | ||||
| Lesser Rgan | ||||
| Intermediate Rgan | ||||
| | jor_nest | Snake's Nest | 190 | - |
Reputation
Ice Castle reputation is granted for completing certain Daily Quests and Instances.
There are 3 obtainable reputation level requiring 1,000 points each.
Talk to Hoyoyo (Option 2) to open a specialized Reputation Shop.
| Reputation Lv | Unlock | Currency Amount |
|---|---|---|
| 0 | NPC will not talk to you. | |
| 1 |  Snow Flower Armor 9 Refine Box Snow Flower Armor 9 Refine Box | Snow Flower Petal 200 |
 Dry Ice Gangu Dry Ice Gangu | Snow Flower Petal 1 |
|
 Ice Castle Teleport Wings Ice Castle Teleport Wings | Snow Flower Petal 1 |
|
| 2 |  Glacier Weapon 9 Refine Box Glacier Weapon 9 Refine Box | Snow Flower Petal 500 |
 Costume Rgan Disguise Tool Costume Rgan Disguise Tool | Snow Flower Petal 1000 |
|
 Costume Iwin Cold Helmet Costume Iwin Cold Helmet | Snow Flower Petal 1000 |
|
| 3 | Daily Quests in Ice Castle grants additional 1 Snow Flower Petal Daily Quests in Snake's Nest grants additional 2 Snow Flower Petal |
|
Item Exchange
Snow Flower Petal Conversion
Talk to Vellgunde (Option 2) to convert 35
Need More Information - Calculation of estimated probabilities.
Ice Flower Magic Stone Conversion
Talk to Vellgunde (Option 3) to convert any 3 Ice Flower Magic Stones for a new random Ice Flower Magic Stone.
This will open a Lapine Ddukdak UI which allows you to select the 3 stones to convert.
Snow Flower Equipment

Talk to Maram (Option 2) to purchase Snow Flower Equipment.


Glacier Weapons - Melee and Bows
Talk to Maram (Option 3) and select Melee and Bows (Option 1) to purchase Glacier Weapons.
| IMG | Item | Currency Amount |
|---|---|---|
 | Glacier Two-handed Sword | 150,000z → 114,000z |
 | Glacier Lance | 150,000z → 114,000z |
 | Glacier Sword | 150,000z → 114,000z |
 | Glacier Basic Sword | 150,000z → 114,000z |
 | Glacier Spear | 150,000z → 114,000z |
 | Glacier Mechanic Axe | 150,000z → 114,000z |
 | Glacier Axe | 150,000z → 114,000z |
 | Glacier Mace | 150,000z → 114,000z |
 | Glacier Mechanic Mace | 150,000z → 114,000z |
 | Glacier Rogue Knife | 150,000z → 114,000z |
 | Glacier Basic Knife | 150,000z → 114,000z |
 | Glacier Bow | 150,000z → 114,000z |
 | Glacier Knuckle | 150,000z → 114,000z |
 | Glacier Book | 150,000z → 114,000z |
 | Glacier Katar | 150,000z → 114,000z |
 | Glacier Violin | 150,000z → 114,000z |
 | Glacier Whip | 150,000z → 114,000z |
Glacier Weapons - Shuriken, Guns, and Staffs
Talk to Maram (Option 3) and select Shuriken, Guns, and Staffs (Option 2) to purchase Glacier Weapons.
| IMG | Item | Currency Amount |
|---|---|---|
 | Glacier Wand | 150,000z → 114,000z |
 | Glacier Staff | 150,000z → 114,000z |
 | Glacier Foxtail | 150,000z → 114,000z |
 | Glacier Huuma Shuriken | 150,000z → 114,000z |
 | Glacier Pistol | 150,000z → 114,000z |
 | Glacier Rifle | 150,000z → 114,000z |
 | Glacier Shotgun | 150,000z → 114,000z |
 | Glacier Gatling | 150,000z → 114,000z |
 | Glacier Launcher | 150,000z → 114,000z |
Snow Flower Magic Stone
Talk to Hoyoyo (Option 1) to convert Snow Flower Magic Stones.
Convenience NPC
Save / Inn
Talk to the Iwin on top of the Feather Bed and Breakfast for the following options:
- Save in Ice Castle
- Inn Service for 5,000z - Fully restore HP/SP
Storage

Talk to the Frozen Jar to open Storage 1 or 2 for 500z.
Warp Service
Warp Service is enabled once completing the Episode 19 - Main Story.
| NPC | Location | Destination |
|---|---|---|
 | (Option 1) | Snake's Nest |
| | (Option 2) | Ice Castle |
 | (Option 1) | Al De Baran |
| (Option 1) | Frozen Tail |
Tool Dealer
Talk to Maram to open the tool dealer shop (Option 1) or to sell your items (Option 4).
| IMG | Item | Currency Amount |
|---|---|---|
 | Magnifier | 40z → 30z |
 | Butterfly Wing | 1,000z → 760z |
 | Fly Wing | 250z → 190z |
 | Novice Fly Wings | 10z → 7z |
 | Compressed Fly Wings | 1,000z → 760z |
 | Concentration Potion | 1,200z → 912z |
 | Awakening Potion | 2,200z → 1,672z |
 | Berserk Potion | 4,500z → 3,420z |
 | Red Potion | 10z → 7z |
 | Orange Potion | 50z → 38z |
 | Yellow Potion | 180z → 136z |
 | White Potion | 1,200z → 912z |
 | Green Potion | 40z → 30z |
 | Yggdrasil Leaf | 12,000z → 9,120z |
 | Empty Bottle | 400z → 304z |
 | Blue Gemstone | 450z → 342z |
 | Venom Knife | 50z → 38z |
Enchantment
Talk to Vellgunde (Option 4) to open a menu for enchantment:
- Snow Flower Armors
- Snow Flower Garments
- Snow Flower Footgear
- Snow Flower Accessories (Right)
- Snow Flower Accessories (Left)
- Glacier Weapons
After selecting which equipment to enchant, the Enchantment System UI will open.
Refer to the Enchantment System for a complete list.
Sources:
https://ro.gnjoy.com/news/update/View.asp?seq=268
https://ro.gnjoy.com/news/notice/View.asp?seq=7551
https://ro.gnjoy.com/news/notice/View.asp?seq=7556
https://ro.gnjoy.com/news/devnote/View.asp?seq=4133023
https://ro.gnjoy.com/news/event/View.asp?Seq=1076
https://www.divine-pride.net/forum/index.php?/topic/5559-kro-main-changelog-january-19-2022/
https://www.divine-pride.net/Gallery/kROM/2022-01-19
https://www.inven.co.kr/board/ro/1951/4751
https://www.inven.co.kr/board/ro/1951/5260
https://www.inven.co.kr/board/ro/1951/5261
https://www.inven.co.kr/board/ro/1951/5262
https://www.inven.co.kr/board/ro/1951/5263
https://www.inven.co.kr/board/ro/1951/5264
https://www.inven.co.kr/board/ro/1951/5271
https://www.inven.co.kr/board/ro/1951/5276
https://www.inven.co.kr/board/ro/1951/5277
https://www.inven.co.kr/board/ro/1952/309078
https://www.inven.co.kr/board/ro/1952/309087
https://www.inven.co.kr/board/ro/1952/309111
https://www.inven.co.kr/board/ro/1952/309132
https://www.inven.co.kr/board/ro/1952/309152
https://www.inven.co.kr/board/ro/1952/309437